How to securely wipe a computer (when selling or disposing)
Last updated on February 8th, 2025When it comes to selling or disposing of an old computer (desktop or laptop), it isn’t always easy to be sure that your data cannot be recovered by the new owner. I’ve spent my career working in the IT industry, so this is my guide on how to securely wipe a computer before you sell or dispose of it.
Backup your data
This process seeks to wipe your computer/laptop, so it’s critical to ensure any data you require from it is backed up first.
If you’re comfortable saving your data to a cloud service such as Microsoft OneDrive, Dropbox or Google Drive, this can make for an easy transition, with data synchronised to the cloud from your old laptop, and automatically synchronised down onto the new laptop relatively simply. Just bear in-mind that such applications only synchronise defined folders, so you will want to check that you don’t have any data that you require in other folders or applications.
Don’t forget website passwords. Most of us let our web browsers remember important passwords for us. If you log into your web browser (e.g. using a Microsoft account on Edge, or Google account on Chrome) then it is likely your passwords are protected by your web browser’s cloud service. If not, you may want to consider logging in, or exporting your passwords to a file, so you can import them into your new laptop.
I recommend setting up your new computer or laptop before wiping your old one, so you can be sure the data you require is available on your new device before the data is deleted from the the old one.
Wiping options
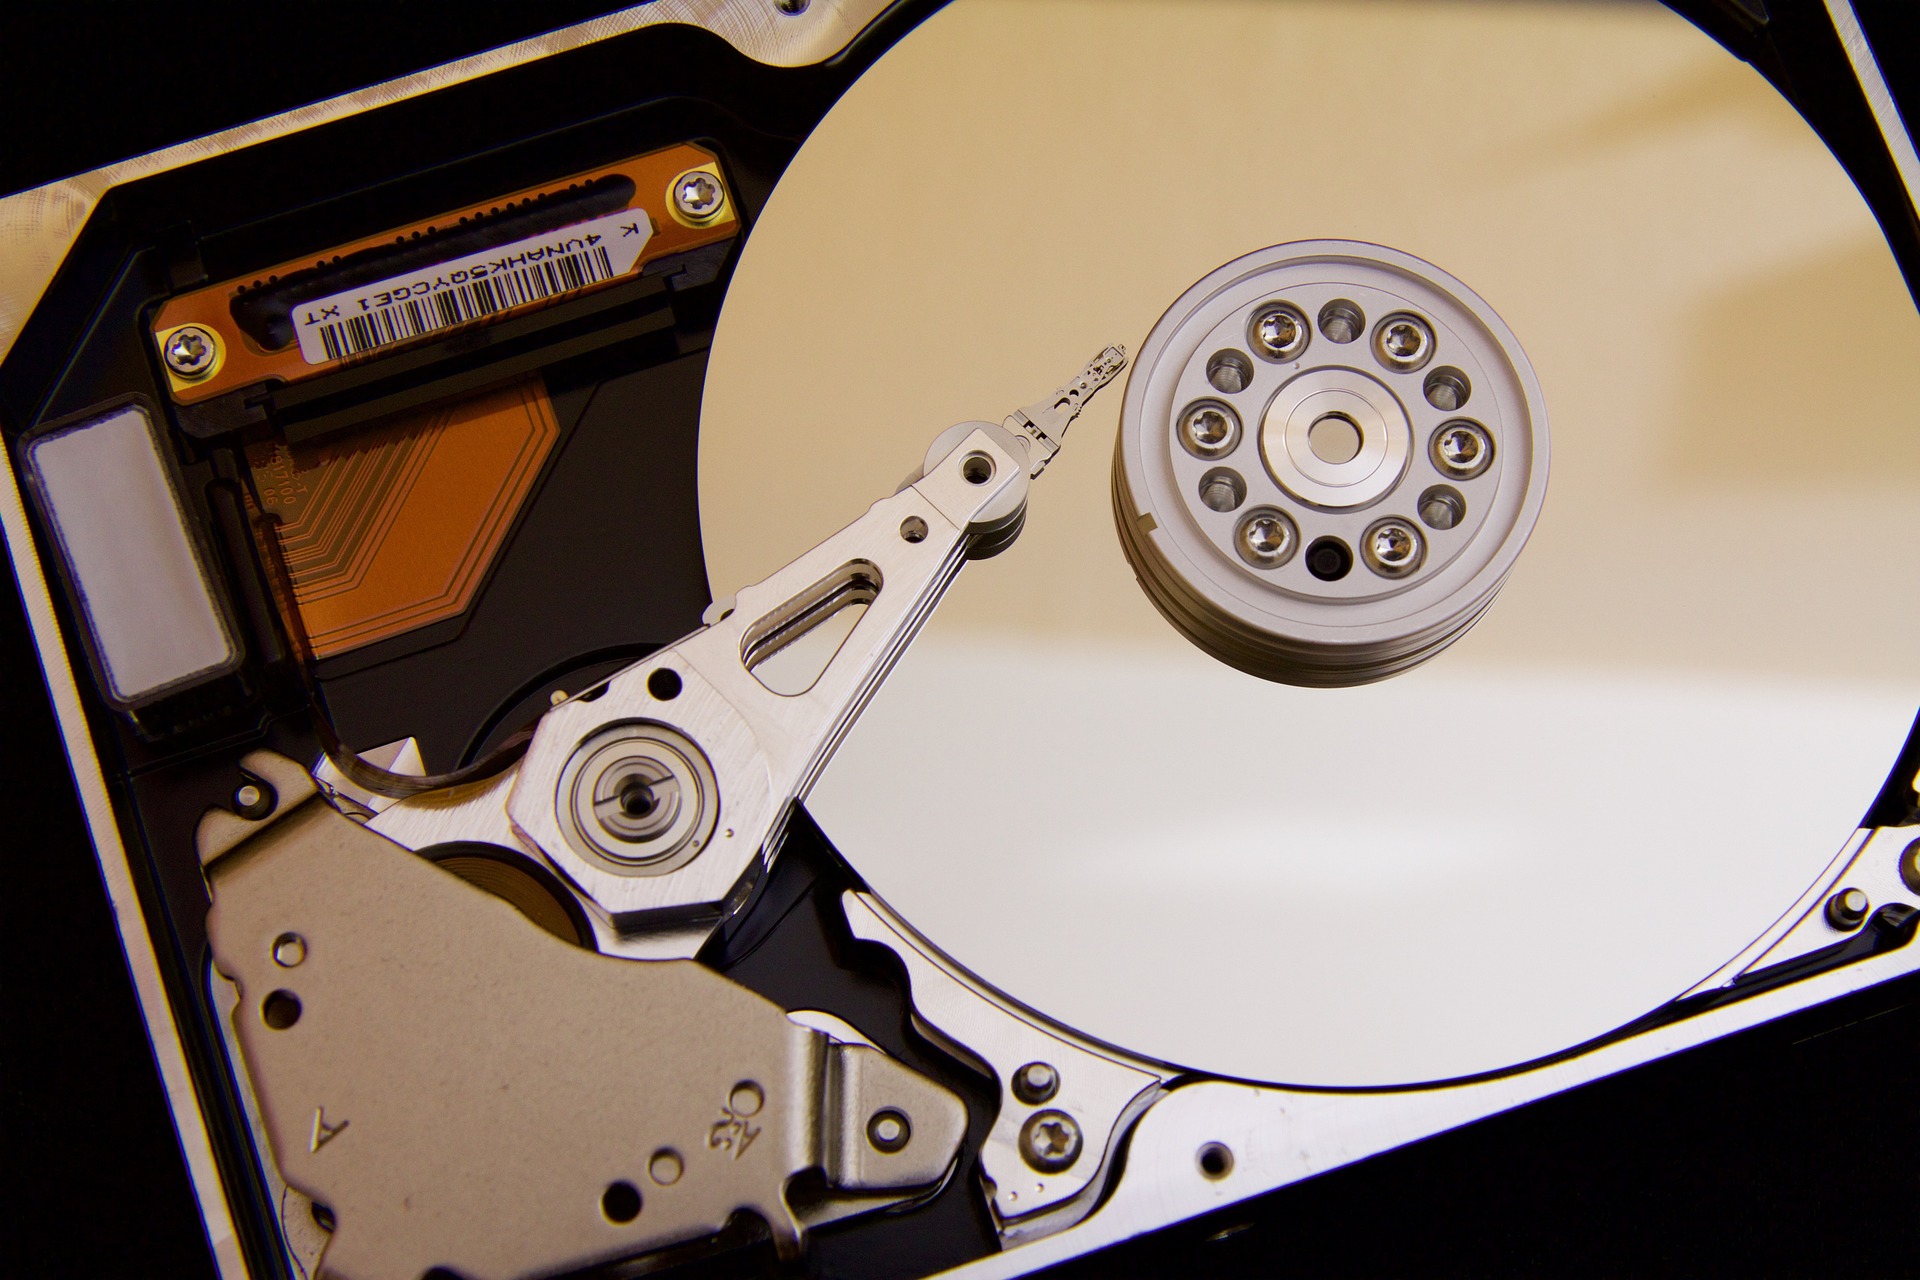
There are many options available to you when wiping your computer. No reasonable option completely removes the chance of data recovery from a determined person, this is why some organisations choose to physically destroy (e.g. shred) used computer or laptop drives rather than sell them.
This said, there are reasonable steps you can take to make the cost, effort and likelihood of recovery unattractive to anyone seeking to do so on your old computer.
I’m proposing two different options in this article, a simple option that anyone can follow, and an advanced option for the technically savvy (that reduces the chance of data recovery further).
OPTION 1: Simple option to securely wipe your old computer
For this option, I recommend using the Microsoft Windows built-in reset process, and clearing your devices (TPM) which holds the keys necessary for the device to unencrypt your drive if you use Microsoft Bitlocker or something similar.
Perform a Windows Reset
Windows 8, 10 and 11 come with their own reset function which can perform a wipe of the main Windows drive including your personal data (e.g. My Documents) and installs a fresh copy of Windows ready for the next person.
Preparation
If this is a laptop, you will need to ensure there is sufficient power to run the wipe process:
- Plug the power cable in
- Only proceed once you have greater than 50% battery power. Do not unplug the power at any point during the reset. This is to ensure it doesn’t run out of power (even if a power outage occurs) during the wipe process
Run the Windows Reset procedure
Windows 8
- Press and hold the Windows key, and tap the “C” key
- Choose “Settings”
- Choose “Change PC settings”
- From the left menu, choose “General”
- Scroll down to the “Remove everything and reinstall Windows” option, and click “Get started”
- Follow the on-screen instructions, but on the second screen, choose “Fully clean the drive”. This will take longer than a basic wipe, but will greatly reduce the chance that someone can recover data your your drive afterwards
- Follow the instructions until the Windows license terms are displayed. At this point, move to the next step (the new owner can complete the licensing steps later)
Windows 10/11
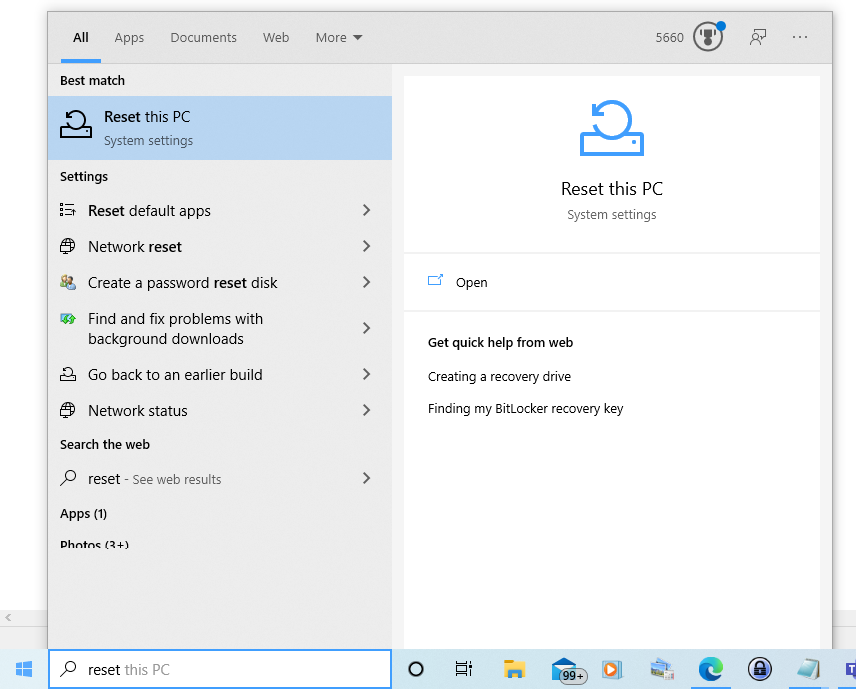
- Whilst logged into Windows, press the Windows key, and type “reset”. Select “Reset this PC”
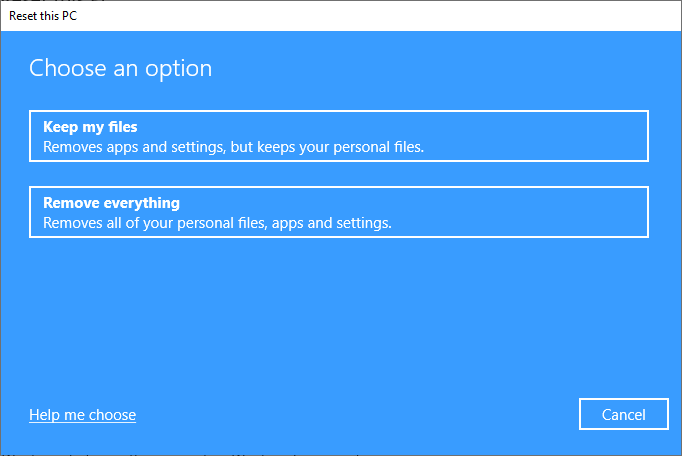
- Under the Reset this PC section, click “Get started”
- You are now presented with 2 options. If you are sure all data can be wiped, choose: “Remove everything”
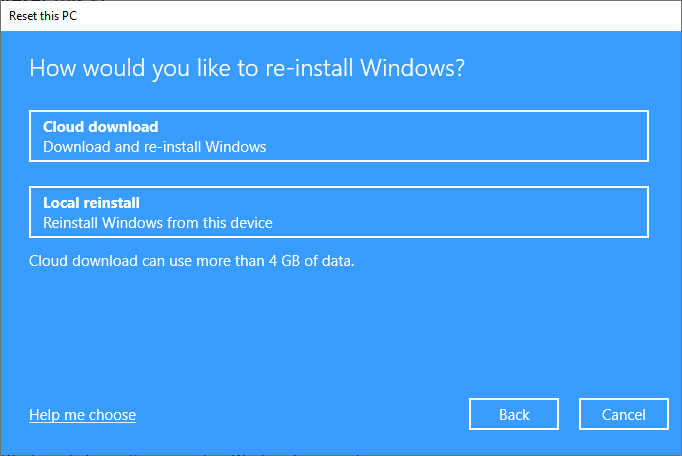
- The next screen will only appear if you are connected to the internet. If it is displayed, I recommend to select “Local reinstall”. This is the faster option, and as you are selling the device, it makes little sense to download the very latest version of Windows for this step.
- On the next screen, choose “Change settings” and make “Clean data?” to Yes. Then confirm and proceed with the on-screen instructions.
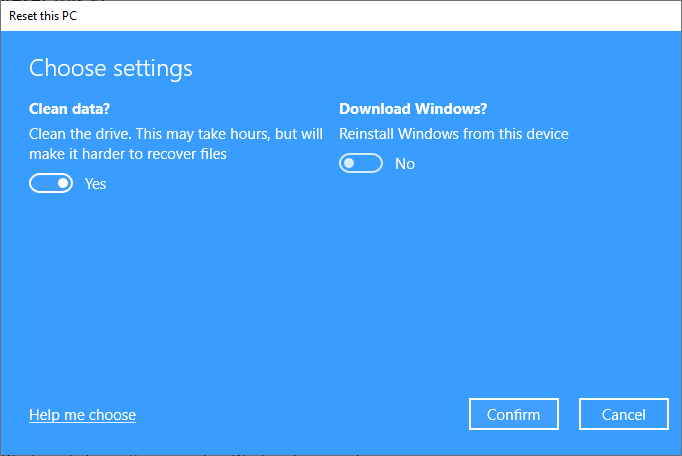
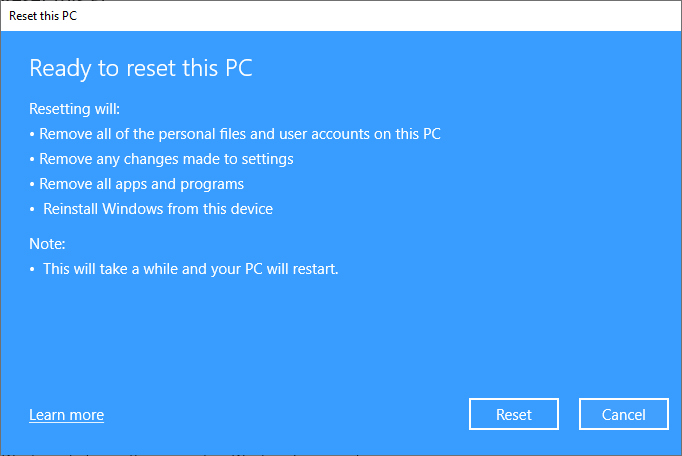
- The next screen is the last one. Check that the screen says it is “Remove all of the personal files and user accounts on this PC”. Then click “Reset” once you are ready for the wipe to start.
Clear TPM
Once you have run the reset, if when you reboot the computer asks you whether you wish to clear the “TPM”, you should choose the option to confirm, yes you wish to clear the TPM. This removes any keys held by your computer to unencrypt your hard drive. Clearing the keys will make it more difficult for anyone to recover data from your device.
If your computer doesn’t ask you whether to clear the “TPM”, then you should try to do this manually by booting your computer/laptop into the UEFI/BIOS (usually achieved by tapping the F2, or Del key immediately after turning the device on). Each UEFI/BIOS menu is different, but you may find a TPM option under a security menu.
Once this action is done, your device is ready for sale/disposal.
OPTION 2: Advanced option to securely wipe your old computer
If you are confident with technical steps, I would recommend using a full disk wipe utility, particularly if your drive isn’t an SSD. This can wipe your disk by writing 1’s and 0’s multiple times to make it extremely unlikely that anyone could recover your data without a very high level of cost, if at all.
- Using a full disk wipe tool such as Darik’s Boot and Nuke (DBAN)
- Clearing the TPM
In your UEFI/BIOS there should be an option to clear the TPM. This removes any TPM keys held for Bitlocker etc. Removing these means the disk should not be able to be unencrypted by the device without the full Bitlocker recovery key, something the new owner would not have (a new and different recovery key would be created if Bitlocker was turned on after this step). - Reinstalling the factory image, or generic Windows
Once the disk wipe is performed, your computer will be left without any partitions on the drive (including no recovery partition for Windows to be installed from). You should therefore prepare a copy of Windows to reinstall afterwards. I recommend visiting your computer vendors website (if not a home build) and downloading the factory image if possible, to provide vendor drivers and any other software that came with the PC. Failing this, a generic Windows installation should identify your Windows licence and provide suitable drivers.